How To Update A Task
Now that you've finished creating your task, you may want to keep your tasks updated when new information arises in regards to the task. PaTMa task management incorporates an easy and effective update feature, that helps you add notes to the task and keep it up to date.
Getting Started
- In the header, navigate to Properties.
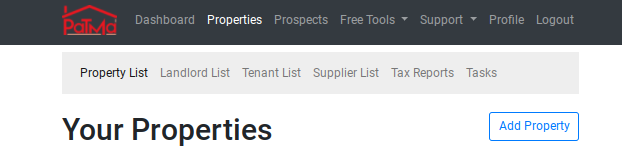
You will be directed to a page listing your current properties.
Note: With the free version of PaTMa, you can only manage one property at a time. To add more than one property to your account. Upgrade to a Premium Account.
-
Click the Property Name you wish to add a task to.
-
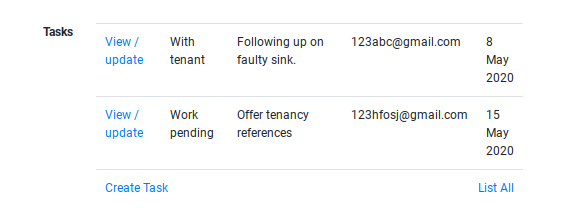
On the property display page, scroll to locate the Tasks column.
-
Click View/Update Task
You will immediately be redirected to a page displaying an empty form with the headings, History and Add note. The next step is to fill in this form with all the details relating to the update.
Filling The Form
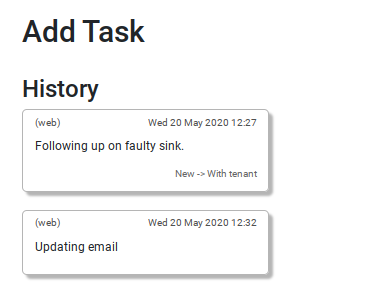
If you have updated the task before, you will see your previous updates displayed at the top of the page in a note format as below.
Text
In this field, enter the details/information you wish to update the task with. This is what will be displayed in the brief note.
New Status
Here you have the option of renew the status that best relates to the task now because of the changes that occurred.
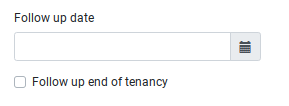
Follow-up Date
In this field, as you did when creating the task, enter the date you wish to follow up on the task on using the pop-up calendar.
Note: You can choose the option of following up after the tenancy is over. For this day to correlate with the end of tenancy date, mark the box below this field.
Follow-up Owner
In this field, add the email of who you wish to follow up with when the date approaches.
Attachment
In this field you may wish to add a scanned copy of a document relating to the task changes. This could be a receipt of paid labour.
- Once complete, click Save
When you navigate back to the task section of your property display, the you will see your tasks presented in a list format as below.
- Click View/Update to view the updates you've added.
The notes will be listed from oldest to newest at the top of the page under the heading History.