Inventory Management
Overview
A good inventory can save a lot of stress at the end of a tenancy.
By keeping a clear record of a property's condition, furnishings and fittings at move-in, you create a useful point of reference for future inspections, check-outs and potential deposit disputes.
PaTMa includes a full inventory management system, allowing you to build room-by-room inventories, record item conditions, attach photos and generate professional inventory reports for tenant approval.
You decide how detailed your inventory needs to be, but it is generally good practice to record major fixtures, furnishings and their condition — particularly if tenants may be held responsible for damage beyond normal wear and tear.
Before You Begin
Before creating an inventory, you should already have:
Inventories are created per tenancy, but inventory data can carry forward between tenancies for the same property.
This makes future inventories much quicker to create.
Accessing Inventory
Open the relevant property and navigate to the Tenancies tab.
From the tenancy, select Inventory.
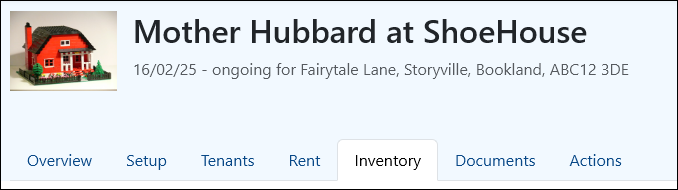
You may also notice utility options from this area, although utilities are usually easier to manage from the property itself via Utility Management.
If utilities have not yet been added, PaTMa may prompt you to set them up.
Step 1: Add Rooms
Inventories are organised by room.
Start by selecting Add Room at the bottom of the inventory overview.
For each room, you'll enter:
- Label – Room name (for example, Kitchen or Bedroom 1)
- Description – Optional room description
- Comments – Any additional notes
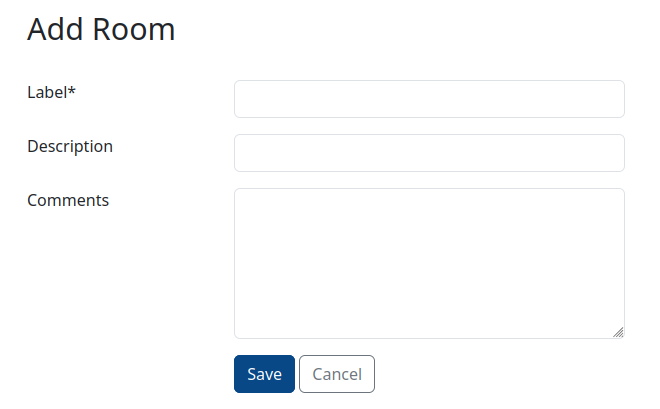
Select Save to add the room.
The room will now appear in your inventory.
Step 2: Add Items
Once rooms are created, you can begin adding items and fittings to each room.
Select Add Item within the relevant room.
For each item, you'll enter:
- Label – Item name (for example, Carpet, Freezer or Sofa)
- Description – Optional additional description
- Condition – Overall condition rating
- Condition Details – Notes such as scratches, marks, age or wear
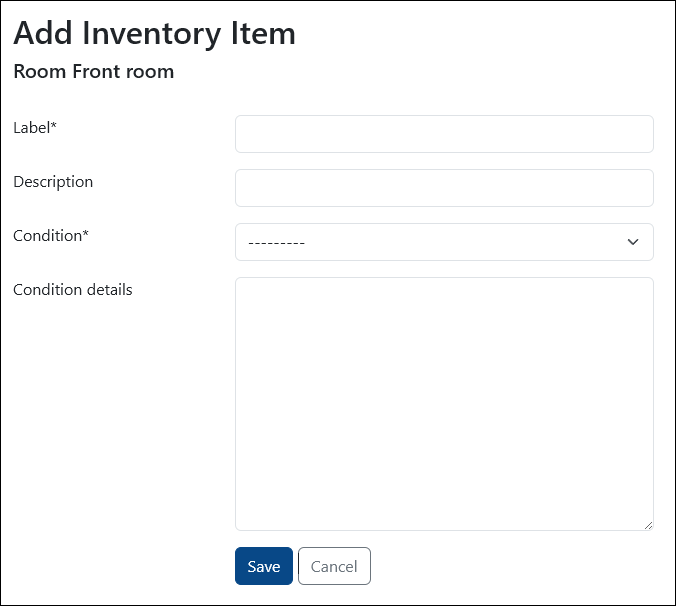
Select Save to add the item.
Repeat this for all important items within each room.
Step 3: Add Photos (Optional)
Photos can make inventories significantly more useful.
You can attach images to inventory items to document their condition at move-in.
This is especially helpful for:
- Existing wear or damage
- Expensive appliances
- Furnished properties
- End-of-tenancy comparisons
For more information, see Inventory Images.
Step 4: Generate the Inventory Report
Once your inventory is complete, PaTMa can generate a professional inventory report.
The report includes your recorded rooms, items, notes and condition information in a structured document.
To generate the report:
- Select Generate PDF
- Wait for the report to finish processing
- Select Download PDF
The inventory report can then be:
- Downloaded for your records
- Printed
- Emailed to tenants
- Sent for online signing
This creates a clear record of the property's condition at the start of the tenancy.
Clone Inventory (HMO Feature)
Managing multiple similar rooms in an HMO?
PaTMa includes an inventory cloning feature to save time.
If one room already has a completed inventory, you can clone it when creating a new inventory for another unit in the same building.
This is ideal when multiple rooms share similar:
- Furniture
- Fixtures
- Appliances
- Décor
To clone an inventory, select an existing inventory from the Add Inventory screen.
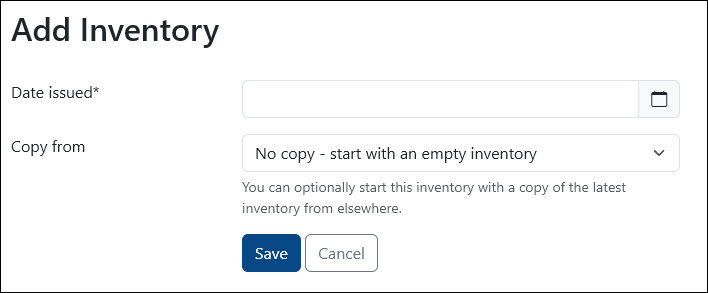
If no other inventories exist for that building, cloning will not be available.
ℹ️ Remember: inventories are linked to a tenancy, not directly to a property or unit.
A Quick Tip
The more detailed your move-in inventory is, the easier end-of-tenancy discussions become.
A few extra minutes spent recording condition and photos at the start can save significant time if disputes arise later.