Create a Mortgage
Overview
Tracking mortgage data is an important part of understanding your property's true performance.
PaTMa allows you to record mortgage details, track mortgage payments and monitor how borrowing affects the profitability of your portfolio.
By keeping mortgage information up to date, you'll also unlock better reporting within Insights, including loan-to-value calculations and portfolio performance metrics.
PaTMa can help you:
- Record mortgage details
- Track mortgage repayments
- Monitor outstanding borrowing
- Store property valuations
- Receive reminders before fixed rates expire
Adding a Mortgage
To add a mortgage, open the relevant property from Your Portfolio.
From the Property Overview, select Add Mortgage.
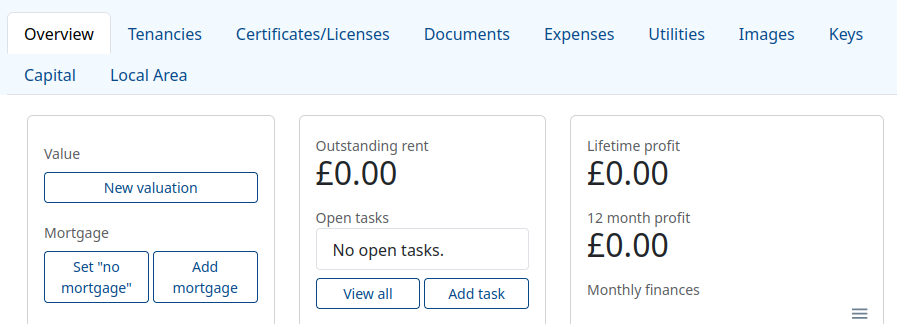
ℹ️ If the property was purchased in cash or the mortgage has already been fully repaid, select Set No Mortgage instead.
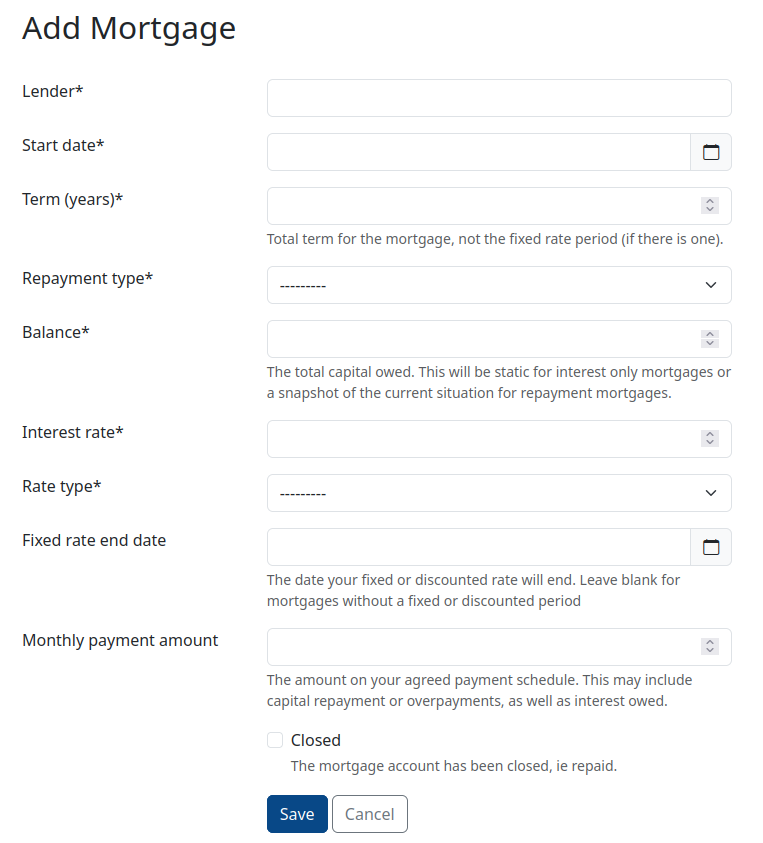
You'll then be asked to enter the mortgage details.
Mortgage Information
You'll need to provide:
- Lender – Your mortgage provider
- Start Date – When the mortgage began
- Term (Years) – Length of the mortgage
- Repayment Type – Interest-only, repayment or other structure
- Balance – Current mortgage balance
- Interest Rate – Current rate as a percentage
- Rate Type – Fixed, variable or other
- Fixed Rate End Date – Required for fixed-rate mortgages
- Monthly Payment Amount – Your regular monthly payment
- Closed – Only select if the mortgage has already been fully repaid
Once saved, the mortgage will be linked to the property and included in your financial reporting.
Recording Mortgage Payments
After the mortgage has been added, you can begin recording repayments.
Open the relevant property from Your Portfolio and select the Expenses tab.
Select Add Mortgage Payment.

This opens the mortgage payment form.
You'll need to enter:
- Date Paid – When the payment was made
- Payment Method – Direct debit, card, bank transfer, etc.
- Amount – Amount paid
- Supplier – Usually the mortgage lender
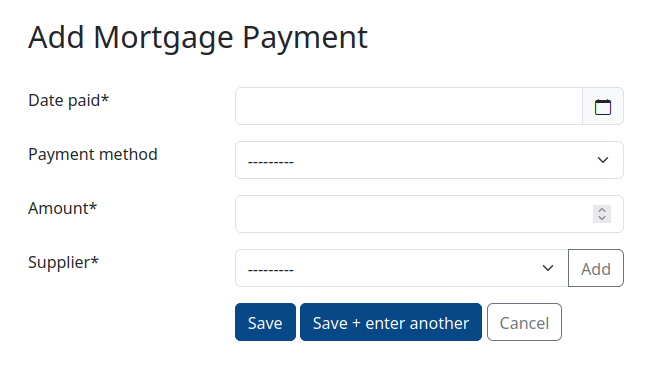
Once complete, select:
- Save – To save and close
- Save + Enter Another – To continue adding payments
Mortgage payments are then recorded against the property for future reporting and analysis.
Fixed Rate Reminders
If your mortgage uses a fixed rate, PaTMa can remind you before that fixed period ends.
This can help you avoid unexpectedly moving onto a higher variable rate and gives you time to explore remortgage options.
For more information, see Mortgage Reminders.
A Quick Tip
Keeping both mortgage details and payment history up to date gives you a much clearer picture of real profitability.
Many landlords focus heavily on rental income, but mortgage costs are often the single biggest outgoing — so accurate tracking makes a big difference when reviewing portfolio performance.