Add Images
Overview
Property Prospector imports property images automatically where they are available (for example from Zoopla). However, if you need additional images, you can add them directly.
The most common uses are
- Additional photos you took while touring a property, or
- Photos of potential repairs or fixes that may be required if you purchase the property.
Get Started
Images are added per-property, and you'll need the property to be on your Shortlist first.
Open the Prospect Overview from your shortlist, then the Attachments tab.
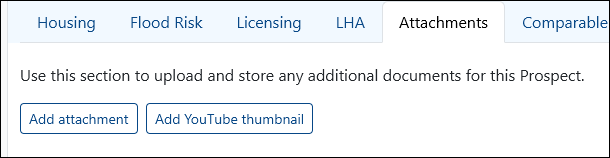
You can either upload an image from your computer, or import a YouTube thumbnail.
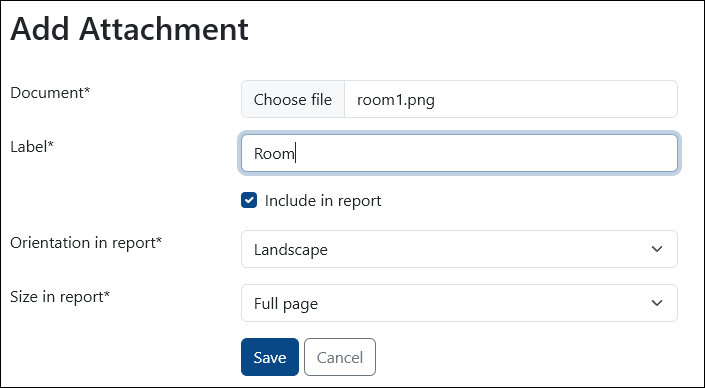
Add Attachment
Select the image from your computer and add some info about it:
- Document - the image on your computer to upload.
- Label - the name of the image in your PatMa account.
- Include in report - check to include the photo in your downloadable reports.
- Orientation in report - display the image landscape or portrait.
- Size in report - how much space to give the image in a downloaded report.
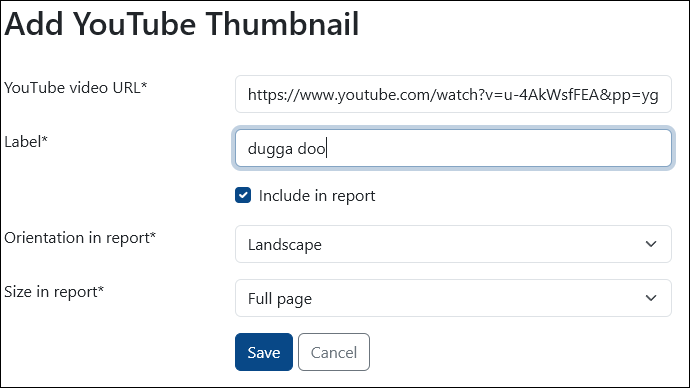
Add YouTube Thumbnail
For video tours you may want the YouTube thumbnail - often a nice shot of the property which isn't included in the listing.
- YouTube video URL - link to the video on YouTube.
- Label - the name of the image in your PatMa account.
- Include in report - check to include the photo in your downloadable reports.
- Orientation in report - display the image landscape or portrait.
- Size in report - how much space to give the image in a downloaded report.
Viewing Custom Images
All uploaded images are displayed in the Attachments tab.
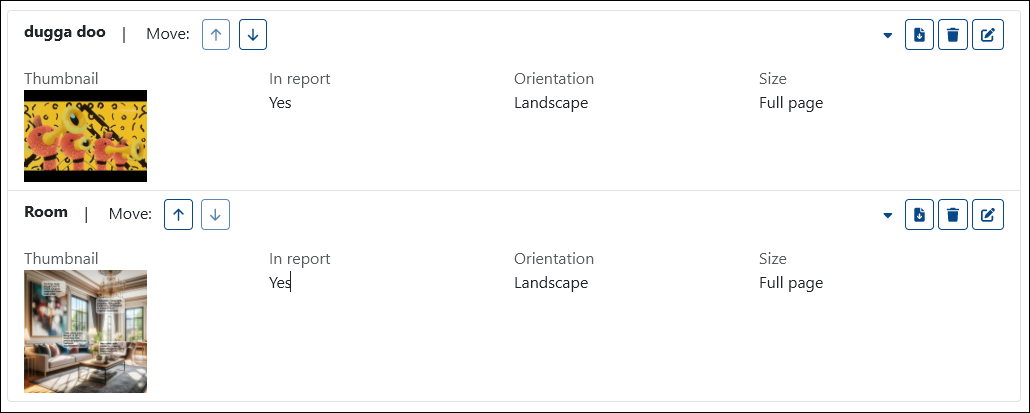
You can Download, Delete, or Edit an image using the icons on the right.
![]()
Deleting an image is permanent - PaTMa does not keep a backup for you.