Utility Management
Overview
Most buy-to-let inventories include utility handovers.
PaTMa allows you to keep track of utility suppliers for each of your properties, supporting metered and unmetered connections.
Adding a Utility
Utilities are added from the Property Overview.
After selecting your property, open the Utilities tab and click Add utility.
Fill out the form that appears:
- Type - the utility being added (eg gas, electric, etc).
- Who pays - whether the bill is paid by the tenant or the landlord.
- Metered - check this if the conection is metered.
- Unit - For HMOs only, the unit the utility is provided for.
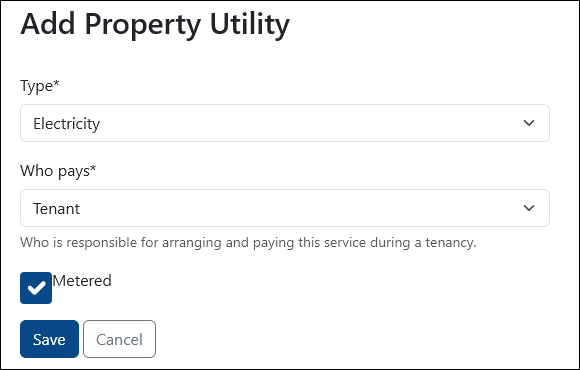
Click Save to add the utility to the property.
Setting The Supplier
Return to the Utilities tab to see a list of all utilities for the property.
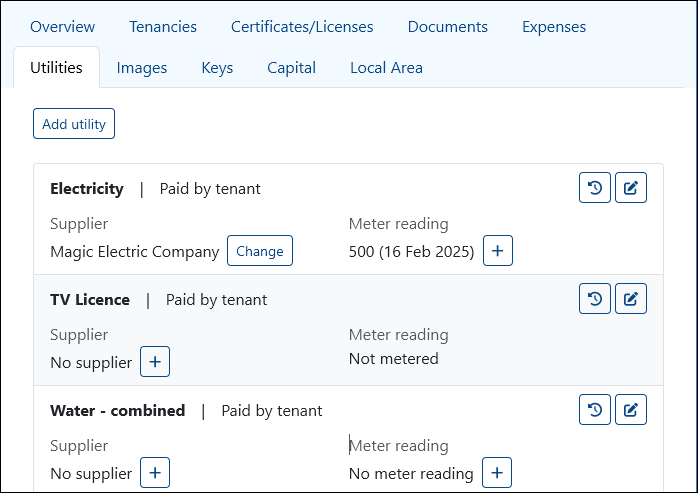
Click the icon next to No supplier to open a list of suppliers, then choose the supplier for the utility, and the date the contract began. You can change the supplier in the same way later if needed.
Save the update when the supplier and start date have been selected. Both fields are required.
A supplier must be added to your Property Manager portfolio before they can be selected.
If the supplier does not yet exist in your portfolio, click Add next to the selection box to open the Add Supplier form in a lightbox.
New suppliers can also be added from the Suppliers Overview.
Adding a Meter Reading
Click the + icon under Meter Reading to add a new reading.
Fill out the form as follows:
- Date taken - the date of the meter reading.
- Reading - the number (or other value) of the reading.
- Notes - any other relevant notes.
- Photo - an optional photo of the meter reading as proof the value is correct.
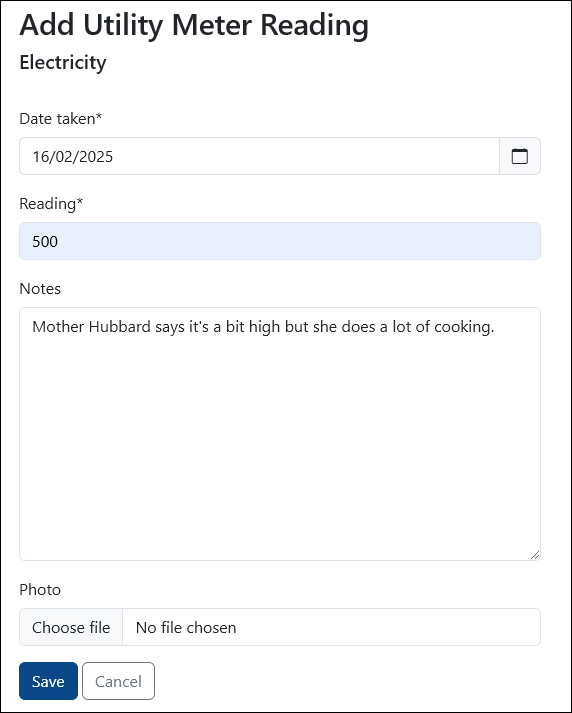
✅ Regular photographs of meter readings are recommended, as they are useful in the event of any dispute.
Remember to click Save when ready!
You can also read more about adding meter readings.
Utility Log
All meter readings entered are logged for reference, as are any changes to supplier. You can access the log from the Rewind icon on the righthand side.
The log shows all entries made in chronological order (oldest to newest), as well as the utility overview.