Tenancy Checklist
PaTMa's tenancy checklist is one of our most useful features, designed to help you through the process of starting a new assured shorthold tenancy agreement.
The tenancy checklist contains step by step guides and instructions to ensure your new tenancy is fully compliant with all relevant regulations (note: UK only).
Whether you are a new landlord or are juggling hundreds of properties (or anywhere in between), the checklist walks your through every step, prompting for important documents and keeping your tenants updated as well.
When the checklist is complete your PaTMa account will contain a complete record of the tenancy and the tenancy agreement.
Key Features
Tenant Information
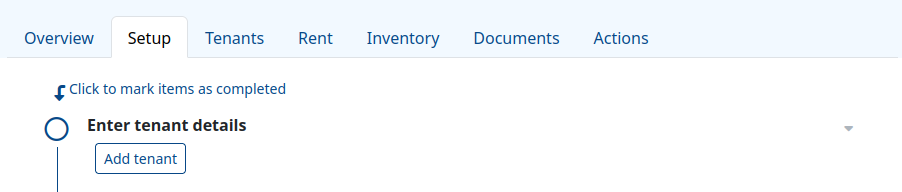
Your tenant and their contact info will be stored in your PaTMa account. Important documentation can be sent to the tenant through the free Tenant Portal, and you can record right to rent info, credit checks, and so on.
Documentation
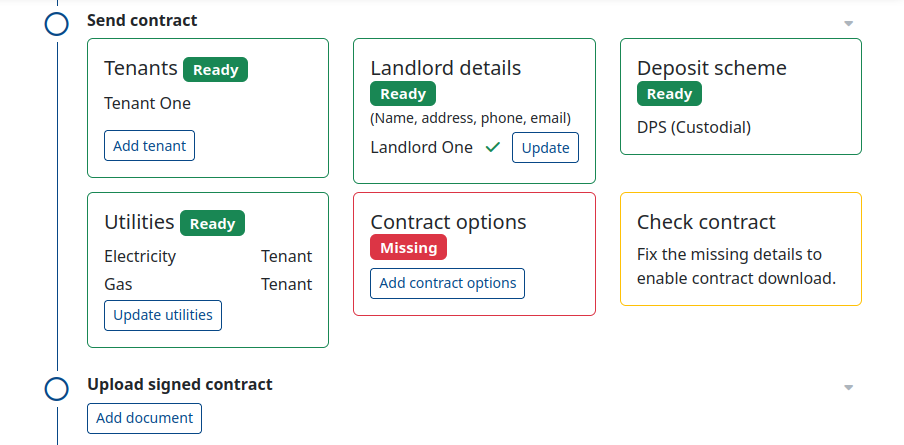
The checklist will prompt you to add safety certificates and licenses, which are sent to the tenant along with the government How to Rent guide and the Deposit Terms (both automatically included).
You can also include other important documents for your tenants, such as appliance manuals, building plans, or the map to the buried treasure in the garden.
All this happens from within PaTMa - you just need a scanned or electronic copy of the documents.
Contracts
PaTMa can generate the contract to be signed by your tenant, and send it to them for digital signing. Or, you can upload a scan of a printed copy the tenant has signed.
Inventory
PaTMa allows you to keep track of what's in the property, on a per-tenancy basis. Tenants can be given a complete inventory, including images, to sign off on when moving in.
Utilities
You can record utilities and the current meter reading at the start of the tenancy.
PaTMa can optionally send this directly to the supplier via email, helping the transition to the new tenant.